How to synchronise your cameras for easy culling and editing
You open your Lightroom catalog and the photos from four different cameras are out of order. What can you do avoid this headache?
Dealing with multiples cameras on a wedding day means that synchronisation is vital, especially when it comes to culling and editing your images.
Today, I want to share a few tips to show you how to synchronise your cameras to ensure that your wedding images are in order.

1. The easy way: synchronise on the day
The fastest and easiest approach is to synchronise all cameras before the photographers start shooting, meaning that all cameras will have the same clock time.
To synchronise your own cameras, set the same time (hour, minute & second) on both cameras and press OK simultaneously.
For Nikon users: go to Menu - Time zone & date - Date and time.
For Canon users: Menu - Date/Time/Zone.


Matching the Nikon clock to the Canon camera
If you have a second shooter working with you from the beginning of the wedding day, make them match their timing to yours. They need to adjust their camera clock to your camera and press ok when the timings match.
If you are not starting the day together, have everyone photograph the same thing at the same time with all cameras (it could be your phone or your car, anything will do as long as it stands out as the timing image). This image will serve as your reference when you adjust timings later.
2. Synchronise after the day
If you didn't synchronise all the cameras on the day, do not worry. You can fix this in Photo Mechanic or Lightroom as long as you have taken a reference photo on the day (see above).
Synchronise your photos with Photo Mechanic
If you do not cull through Photo Mechanic, you totally should! I have written a blog pos here on how it well help you cull your weddings photos fast.
1. Organise your photos by Serial number.

2. Select the reference image you shot on the wedding day and write down the timing of that image.

3. Select the images from the camera you need to synchronise
4. Go to Tools - Adjust Capture Dates and Times.

5. Go through the images until you reach your reference image and enter the time and date you wrote. Select Adjust Photos and Photo Mechanic will change the time of all the selected images.

Use the arrows to go to your reference image and change the date on that image.
6. Repeat for all cameras until they are all in order!
7. If you have forgotten to photograph a reference image on the day, find an image that everyone shot at the same time (like the first kiss) and use this as your reference frame.
Synchronise your photos with Lightroom
1. Make a note of the time of your main camera's reference image by going to the Library module, selecting your reference images and going to the Metadata panel.

2. Organise your photos by serial number. Go to View - Show Filter Bar.
The filter bar will appear at the bottom right of your screen and select Camera Info.
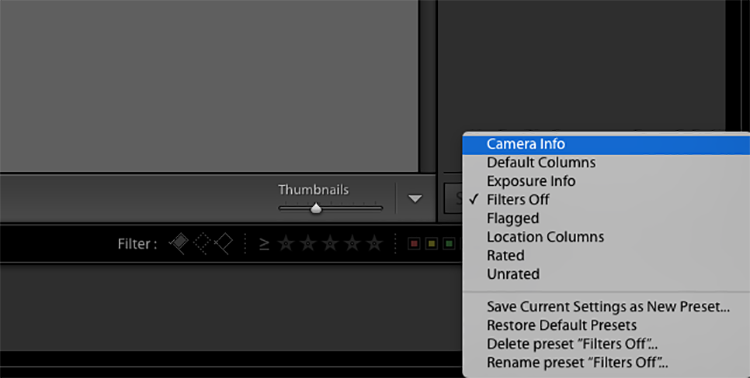
3. You will now be able to filter out the images by camera's serial number. Click on Camera and select Camera Serial Number from the drop down menu.


4. Choose the reference image of the first camera you need to synchronise and then select all the images that need to be adjusted for that camera. Do this with Edit - Select All or CTRL+A.
5. Go to Metadata - Edit Capture Time

6. Select Adjust to a specified date and time, then change the time under Corrected Time to the time from the main camera's reference image.

6. Select Adjust to a specified date and time, then change the time under Corrected Time to the time from the main camera's reference image.
7. Repeat the process for each camera that was used.
8. When you are done, go to Filter by capture time and the photos will be in chronological order!
7. If you have forgotten to photograph a reference image on the day, find an image that everyone shot at the same time (like the first kiss) and use this as your reference frame.
That's it! You’ve done it!
I hope this guide on how to synchronise your wedding photos is helpful. Let me know in the comments if you have any questions!
Now that you have synchronised your weddings, check out this post to learn how to cull your weddings faster.
If culling weddings make you want to tear your hair out, get in touch with me as I offer a culling service!